ColdFusion Archive and Deployment
ColdFusion Archive and Deployment enables you to easily migrate your ColdFusion application to different environments. For example, from your development environment to your staging or test environment, then from your staging environment to your production environment.
All your ColdFusion code and ColdFusion Administrator settings can be stored in one .car file. Building this .car file is as simple as selecting the files/folders and ColdFusion Administrator settings your would like to include, then clicking the Build Archive icon. Deploying the .car file to a new environment is even easier - you simply navigate to the .car file and click Deploy.
Configuring ColdFusion Archive and Deployment
- Log in to the ColdFusion Administrator
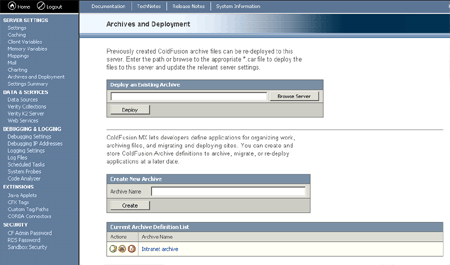
- Click Archive and Deployment
- Enter a name for the archive (under Create New Archive)
- Click Create (this launches the Archive Wizard in a pop-up window)
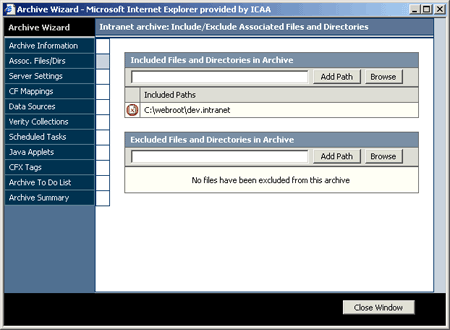
- From here, you define what will be included in the archive. You can also define files to be excluded. You can include as much or as little as you like. For example, you might only want to include files, or, you might like to include ColdFusion Administrator settings such as datasources, verity collections etc. Note that each environment may have slight differences for things like database names, usernames, passwords, verity file paths etc. Sometimes it's easier to configure these manually on each environment. Once you've included all files and settings in your archive, you can close the Archive Wizard.
- Click the Build Archive icon. This launches the Archive Wizard in build mode. Click that the summary is correct.
- Click Next and enter a path where the .car file should be created. Remember to specify the .car filename in the path.
- Click Next. This builds the .car file. You will be prompted when it has completed building the file.
You have now built a ColdFusion Archive file! This file can now be deployed to the new environment.
Deploying a ColdFusion Archive file
- Log in to the ColdFusion Administrator
- Click Archive and Deployment
- Browse to your .car file (under Deploy an existing Archive)
- Click Deploy (this launches the Archive Wizard in a pop-up window)
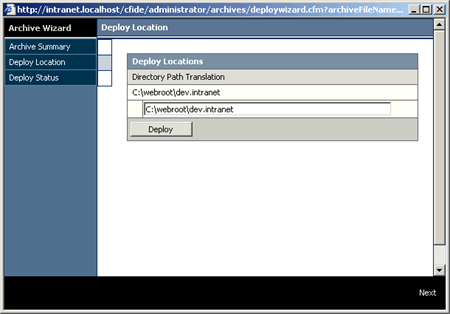
- Click Next. This screen gives you the opportunity to change file paths. For each path included in the archive file, you can change it for the new environment. This is handy, for example, if your environments have different names for their root directories.
- Click Deploy. This deploys the archive file against the new environment. You will be prompted when it has completed the deploy.

The main ColdFusion Archive and Deployment screen.

Building an Archive - the Archive Wizard.

Deploying an Archive - the Archive Wizard.