How to Create a Music Playlist in WordPress
WordPress has built-in functionality that allows you to create a music playlist. All it takes is a few clicks and you can have a new playlist inserted into your post.
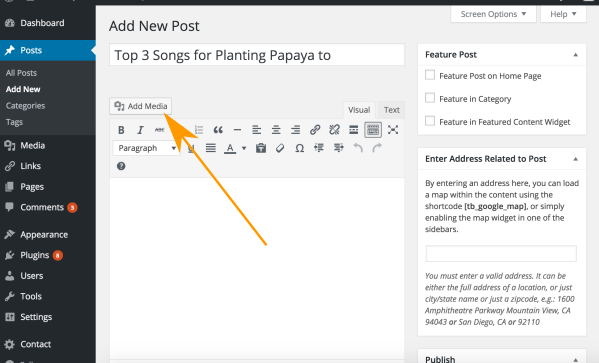
To create a playlist, click on the Media button from within your post (in the admin section).
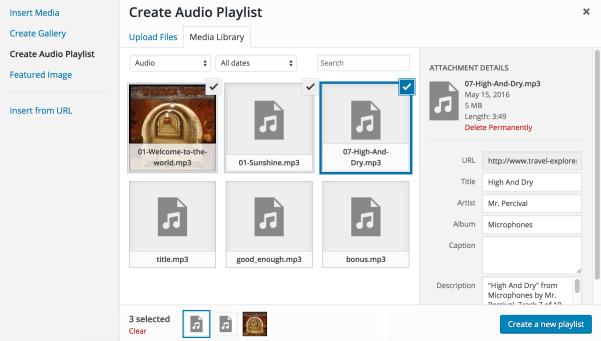
From the Create Audio Playlist section, either use Upload Files or Media Library to select multiple audio files. Once you've selected the files you'd like to be in the playlist, click the Create a new playlist button at the bottom-right corner.
The Edit Audio Playlist screen will appear. Here, you can change the order of the tracks in your playlist (by dragging & dropping or clicking Reverse to reverse the order). You can change the title names if you like. You can also choose whether or not to display the tracklist, artist names, and images.
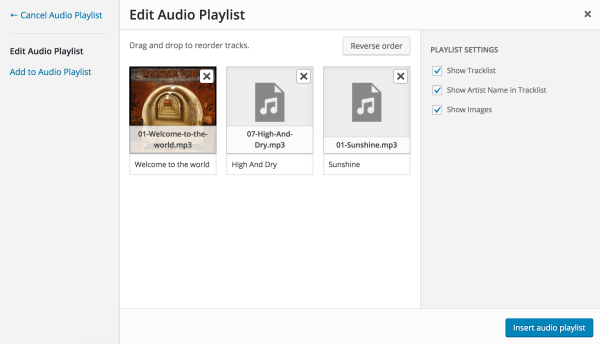
Once you're happy with your playlist settings, click the Insert Audio Playlist button.
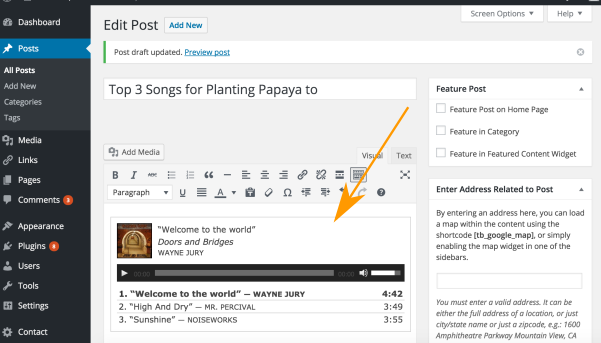
You will now see the playlist inserted into your blog post.
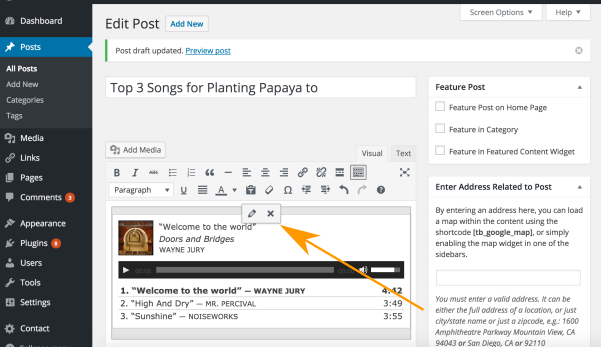
Clicking on the playlist allows you to edit or delete it.